Enabling AMD GPU Passthrough on Harvester
Summary
Recently I realized I know very little about LLMs, and how to make effective use of them. The writing is on the wall, sooner or later I will have a client intending on deploying some LLM workload, while I may not need to be the expert in LLM workloads I will need to be prepared enough. I have also taken some time to come around to LLMs, being confidently fed blatantly false information has always evoked a certain ire in me, but, I have started to find use in them lately. All that to say……I dropped some money on an AMD AI PRO R7000 on a whim and need to justify that expense to myself.
Preparing the VM
Before moving forward, I always prefer to setup my VM and I generally recommend doing the same, confirm you have access, and do any setup you need. The primary goal here is to leave a blank/clean slate VM we can revert to if need be. Once you have your VM ready, power it down, and take a backup.
Enabling GPU Passthrough
Before moving on to the rest of this article you must ensure your harvester node names are NOT FQDNs! This was a mistake I made and it cost me at least a dozen hours if not more, in fact, I ended opening a GitHub issue2 looking for support. Thankfully I was set straight quickly, this is an issue because libvirt does not support . in the domain XML4 and there should be a resolution to it in Harvester v1.8.03. This issue may even be resolved before I publish this, but if you are running a version less than v1.8.0 this applies to you. If you proceed without ensuring your hostnames are set correctly, you will see a vague error message in the pod as it crashloops when your VM attempts to start, something like:
compute panic: runtime error: invalid memory address or nil pointer dereference
compute [signal SIGSEGV: segmentation violation code=0x1 addr=0x8 pc=0x562f1ef4347b]
Another important caveat, you must also ensure your system is NOT using the dedicated GPU, again, because this article is about GPU passthrough (via PCIe passthrough) the host OS can not be using the dedicated GPU that is being passed in to the VM. I was able to set this in the BIOS of my motherboard and enforce the use of the IGD device only. If you pass in the dedicated GPU while the host OS is bound to it you will experience odd behavior with the system intermittently locking up when the VM is powered on.
Install and Setup PCI Device Controller
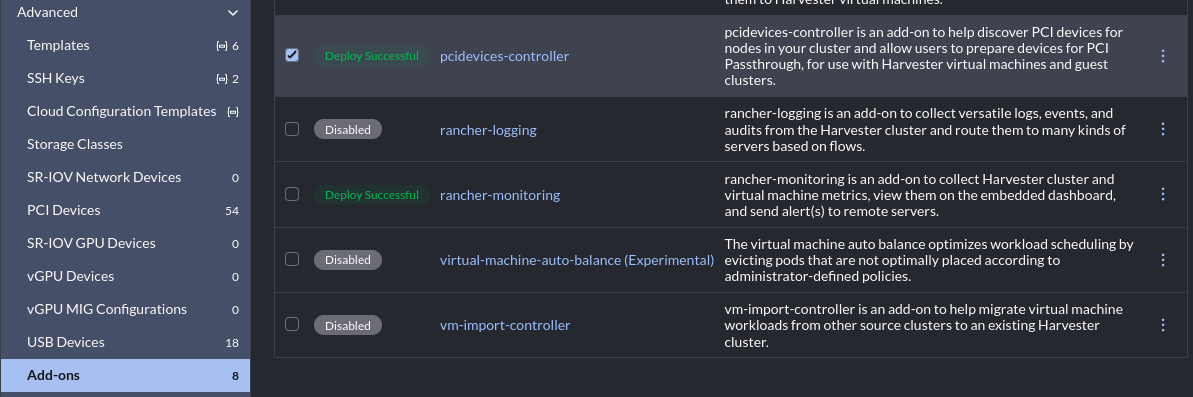
To enable GPU passthrough in Harvester you will need to navigate to “Advanced” -> “Add-ons”, then click the three dots on the far right and select “Enable”:
We need to edit/ensure a feature gate has been added to the KubeVirt CR. Edit the Kubevirt config like so: kubectl edit -n harvester-system Kubevirt kubevirt then add “Sidecar” to the featureGates list. This can be found at: spec.configuration.developerConfiguration.featureGates.
After a short while the controller will deploy and devices will become available in the UI at “Advanced” -> “PCI Devices”, find your GPU, select it, then click “Enable Passthrough”:
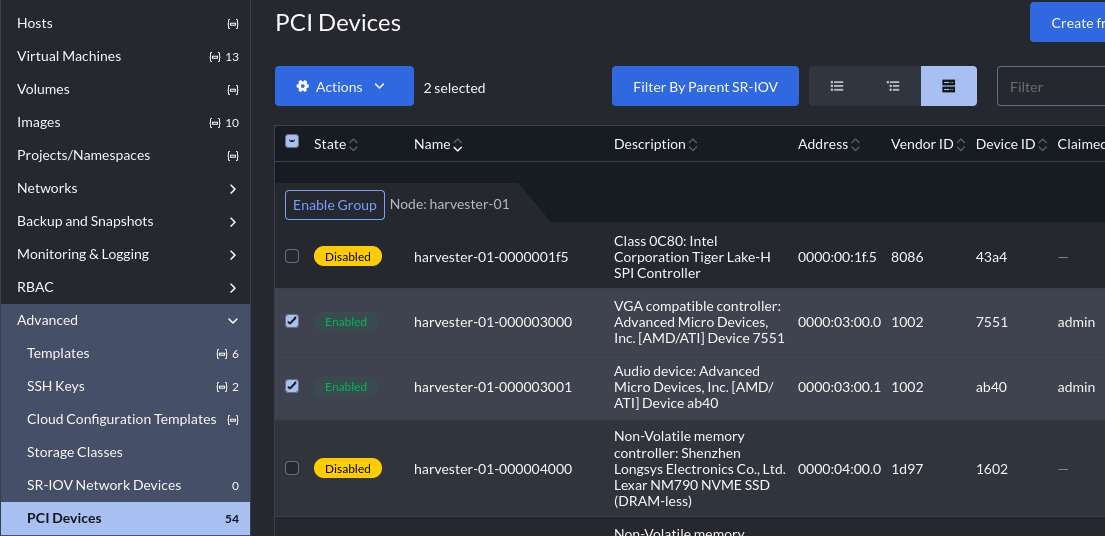
Notice that I have enabled two separate devices in the UI. These are both the AMD card and they are both part of the same IOMMU group, you must pass all devices in an IOMMU group in together, so the VGA controller and audio device must both be enabled and will be passed in together.
We need a few bits of data from this, first we need the device IDs, in my case the device ID of the AMD card’s VGA controller and audio device:
- The VGA controller on my first host (“harvester-01”) is: “harvester-01-000003000”
- The audio device on my first host (“harvester-01”) is: “harvester-01-000003001”
We also need the resource name of each of those devices, we can find that via kubectl:
kubectl get pcidevices.devices.harvesterhci.io harvester-01-000003000 -o jsonpath="{.status.resourceName}"kubectl get pcidevices.devices.harvesterhci.io harvester-01-000003001 -o jsonpath="{.status.resourceName}"
Before moving on, make sure you saved the:
- Device ID of every device in the GPUs IOMMU group
- Device resourceName of every device in the GPUs IOMMU group
Getting the BIOS File
This next section is the real sauce I needed most from the SUSE post mentioned at the top of the article. SSH onto the host holding your GPU and grab the VFCT firmware image, like so:
sudo cat /sys/firmware/acpi/tables/VFCT > /tmp/vfct_dump.bin
Change directories to /tmp, and drop a quick python script to the local directory:
#!/usr/bin/python3
import struct

def extract_vbios(vfct_path, output_path):
    with open(vfct_path, "rb") as f:
        data = f.read()
    # Look for the ATOMBIOS signature start
    # AMD VBIOS usually starts with the standard 0x55AA signature
    # In VFCT, the VBIOS image starts shortly after the table header
    rom_start = data.find(b"\x55\xaa")

    if rom_start == -1:
        print("Error: Could not find VBIOS signature (55AA) in the dump.")
        return

    # In modern VFCT tables, the size is often listed in the header
    # or we can read the length byte from the VBIOS header itself (offset 2)
    rom_size = data[rom_start + 2] * 512
    print(f"Found VBIOS at offset {hex(rom_start)} with size {rom_size} bytes")
    with open(output_path, "wb") as f_out:
        f_out.write(data[rom_start : rom_start + rom_size])
    print(f"Successfully saved to {output_path}")

extract_vbios("vfct_dump.bin", "amdgpu.rom")
Run the script, it will drop a file to the local directory named “amdgpu.rom”, then we need to base64 encode the binary:
cat amdgpu.rom | base64 -w 0 > vbios_base64.txt
We are now ready to pull together our device ID (you wrote that down right?), and now our GPU firmware. We will create a configmap for the ROM, like so:
apiVersion: v1
kind: ConfigMap
metadata:
  name: gpu-vbios-rom
binaryData:
  gpu.rom: <INSERT THE CONTENTS OF vbios_base64.txt IN ONE LINE>
and now we need to create a hookscript configmap, change the ALIAS line with your GPU’s device id, like so:
apiVersion: v1
kind: ConfigMap
metadata:
  name: gpu-xml-hook-script
data:
  gpu_vbios.sh: |
    #!/bin/sh
    tempFile=$(mktemp --dry-run)
    echo $4 > $tempFile
    ALIAS="harvester-01-000003000"
    ROM_DIR="/var/run/kubevirt-private/config-map/gpu-rom-vol"
    ROM_PATH="${ROM_DIR}/gpu.rom"
    chmod 644 "${ROM_PATH}"
    cp $tempFile /tmp/before.xml
    sed -i "s@\(<alias name=\"${ALIAS}\"></alias>\)@\1<rom bar=\"on\" file=\"${ROM_PATH}\"/>@g" $tempFile
    cp $tempFile /tmp/after.xml
    cat $tempFile
Now apply both of these configmaps to the same namespace as the target VM.
Before moving on, make sure you applied the following configmaps to the same namespace of your VM:
- gpu-xml-hook-script
- gpu-vbios-rom
Passthrough the GPU
There are three additions we need to make to the VM spec now, start by making sure the VM is off. We need to:
- Annotate the VM with our hookscript config map
- Add the ROM config map
- Add our GPU to
hostDevices
Annotate the VM
We now need to add an annotation to the VM spec. The annotation will be picked up by the kube-virt controller and attach a sidecar container that runs before the VM is started5. To do so, add the following annotation to your VM:
kubectl patch -n <your VM's namespace> virtualmachine <your VM name> \
  --type='json' \
  -p='[{
    "op": "add",
    "path": "/spec/template/metadata/annotations/hooks.kubevirt.io~1hookSidecars",
    "value": "[{\"image\": \"quay.io/kubevirt/sidecar-shim:v1.2.0-rc.0\", \"args\": [\"--version\", \"v1alpha2\"], \"configMap\": {\"name\": \"gpu-xml-hook-script\", \"key\": \"gpu_vbios.sh\", \"hookPath\": \"/usr/bin/onDefineDomain\"}}]"
  }]'
Add the ROM config map
We need to add the GPU’s ROM as a volume to the VM manifest, the hookscript will make use of this binary and drop it into the correct location later:
kubectl patch -n <your VM's namespace> virtualmachine <your VM name> \
  --type='json' \
  -p='[{
    "op": "add",
    "path": "/spec/template/spec/volumes/-",
    "value": {
      "name": "gpu-rom-vol",
      "configMap": {
        "name": "gpu-vbios-rom"
      }
    }
  }]'
Add our GPU’s IOMMU group to hostDevices
Finally we will add all of the GPU’s IOMMU group to the VM. Remember earlier, I have two devices in the GPU’s IOMMU group:
- VGA Controller:
- ID:
harvester-01-000003000 - resourceName:
amd.com/7551
- ID:
- Audio device:
- ID:
harvester-01-000003001 - resourceName:
amd.com/ab40
- ID:
Each device must be passed in, and the sample below will need to be tweaked to however many devices you have:
kubectl patch -n <your VM's namespace> virtualmachine <your VM name> \
  --type='json' \
  -p='[{
    "op": "add",
    "path": "/spec/template/spec/domain/devices/hostDevices",
    "value": []
  }, {
    "op": "add",
    "path": "/spec/template/spec/domain/devices/hostDevices/-",
    "value": {
      "deviceName": "amd.com/7551",
      "name": "harvester-01-000003000"
  }}, {
    "op": "add",
    "path": "/spec/template/spec/domain/devices/hostDevices/-",
    "value": {
      "deviceName": "amd.com/ab40",
      "name": "harvester-01-000003001"
    }
  }]'
I would like to be more clear, you will lose the added volume. This is why I made the VM in the UI first. Make the VM and use all the UI bits to write out the majority of the spec first, then make minor tweaks.
Conclusion
At this point your VM should be good to go and you can start it. When you get logged back into your VM make sure you can see every device we passed in, in the VM, lspci should work fine for showing them. However, just because the device shows up in lspci does not mean the GPU’s BIOS was passed in correctly, if you skipped that step the GPU will show up, but workloads will not actually make use of it.
The major drawback to passing the whole GPU into a VM is that I now have a “cat” VM. I have done well so far in having nothing but “cattle”, perhaps the AMD GPU operator may give me access to the vGPU functionality that Nvidia cards have, and that may allow me to escape having this special snowflake VM. This is something I will most likely investigate in the future, but not now.
Archived Sources
Each source listed above links to the relevant external resource, however for the sake of clarity, or in case any site becomes unavailabe, for whatever reason, archived sources are listed below:
- PCI Passthrough Demystified: Setting up AMD GPUs in Harvester
- [Help wanted] VM with GPU Passthrough Fails to start with “invalid memory address or nil pointer dereference”
- [BUG] PCI vGPU USB device failed to pass through due to . in the hostDevices.name
- Libvirt Domain XML Dormat Docs
- kube-virt Hook Sidecar Container